
Halloween Masquerade
This project involved using a 3D scanner, CNC machine, and vacuum former to produce a masquerade mask as a team project in familiarizing ourselves with the full workflow of those tools. The master mold was CNC machined from HDPE foam and used to vacuum form polycarbonate, which presented a significant challenge given its high glass transition temperature and the need to preserve its optically clear properties throughout the process. The final mask was painted white with kintsugi inspired gold crack detailing and embedded razor blades, nails, and hardware framing the eyes, creating a cohesive and striking theme the team designed together. Additional challenges included designing a mask that fit all three team members comfortably while remaining aesthetically pleasing, and developing CAM toolpaths that stayed within the physical cut depth limitations of the CNC machine.
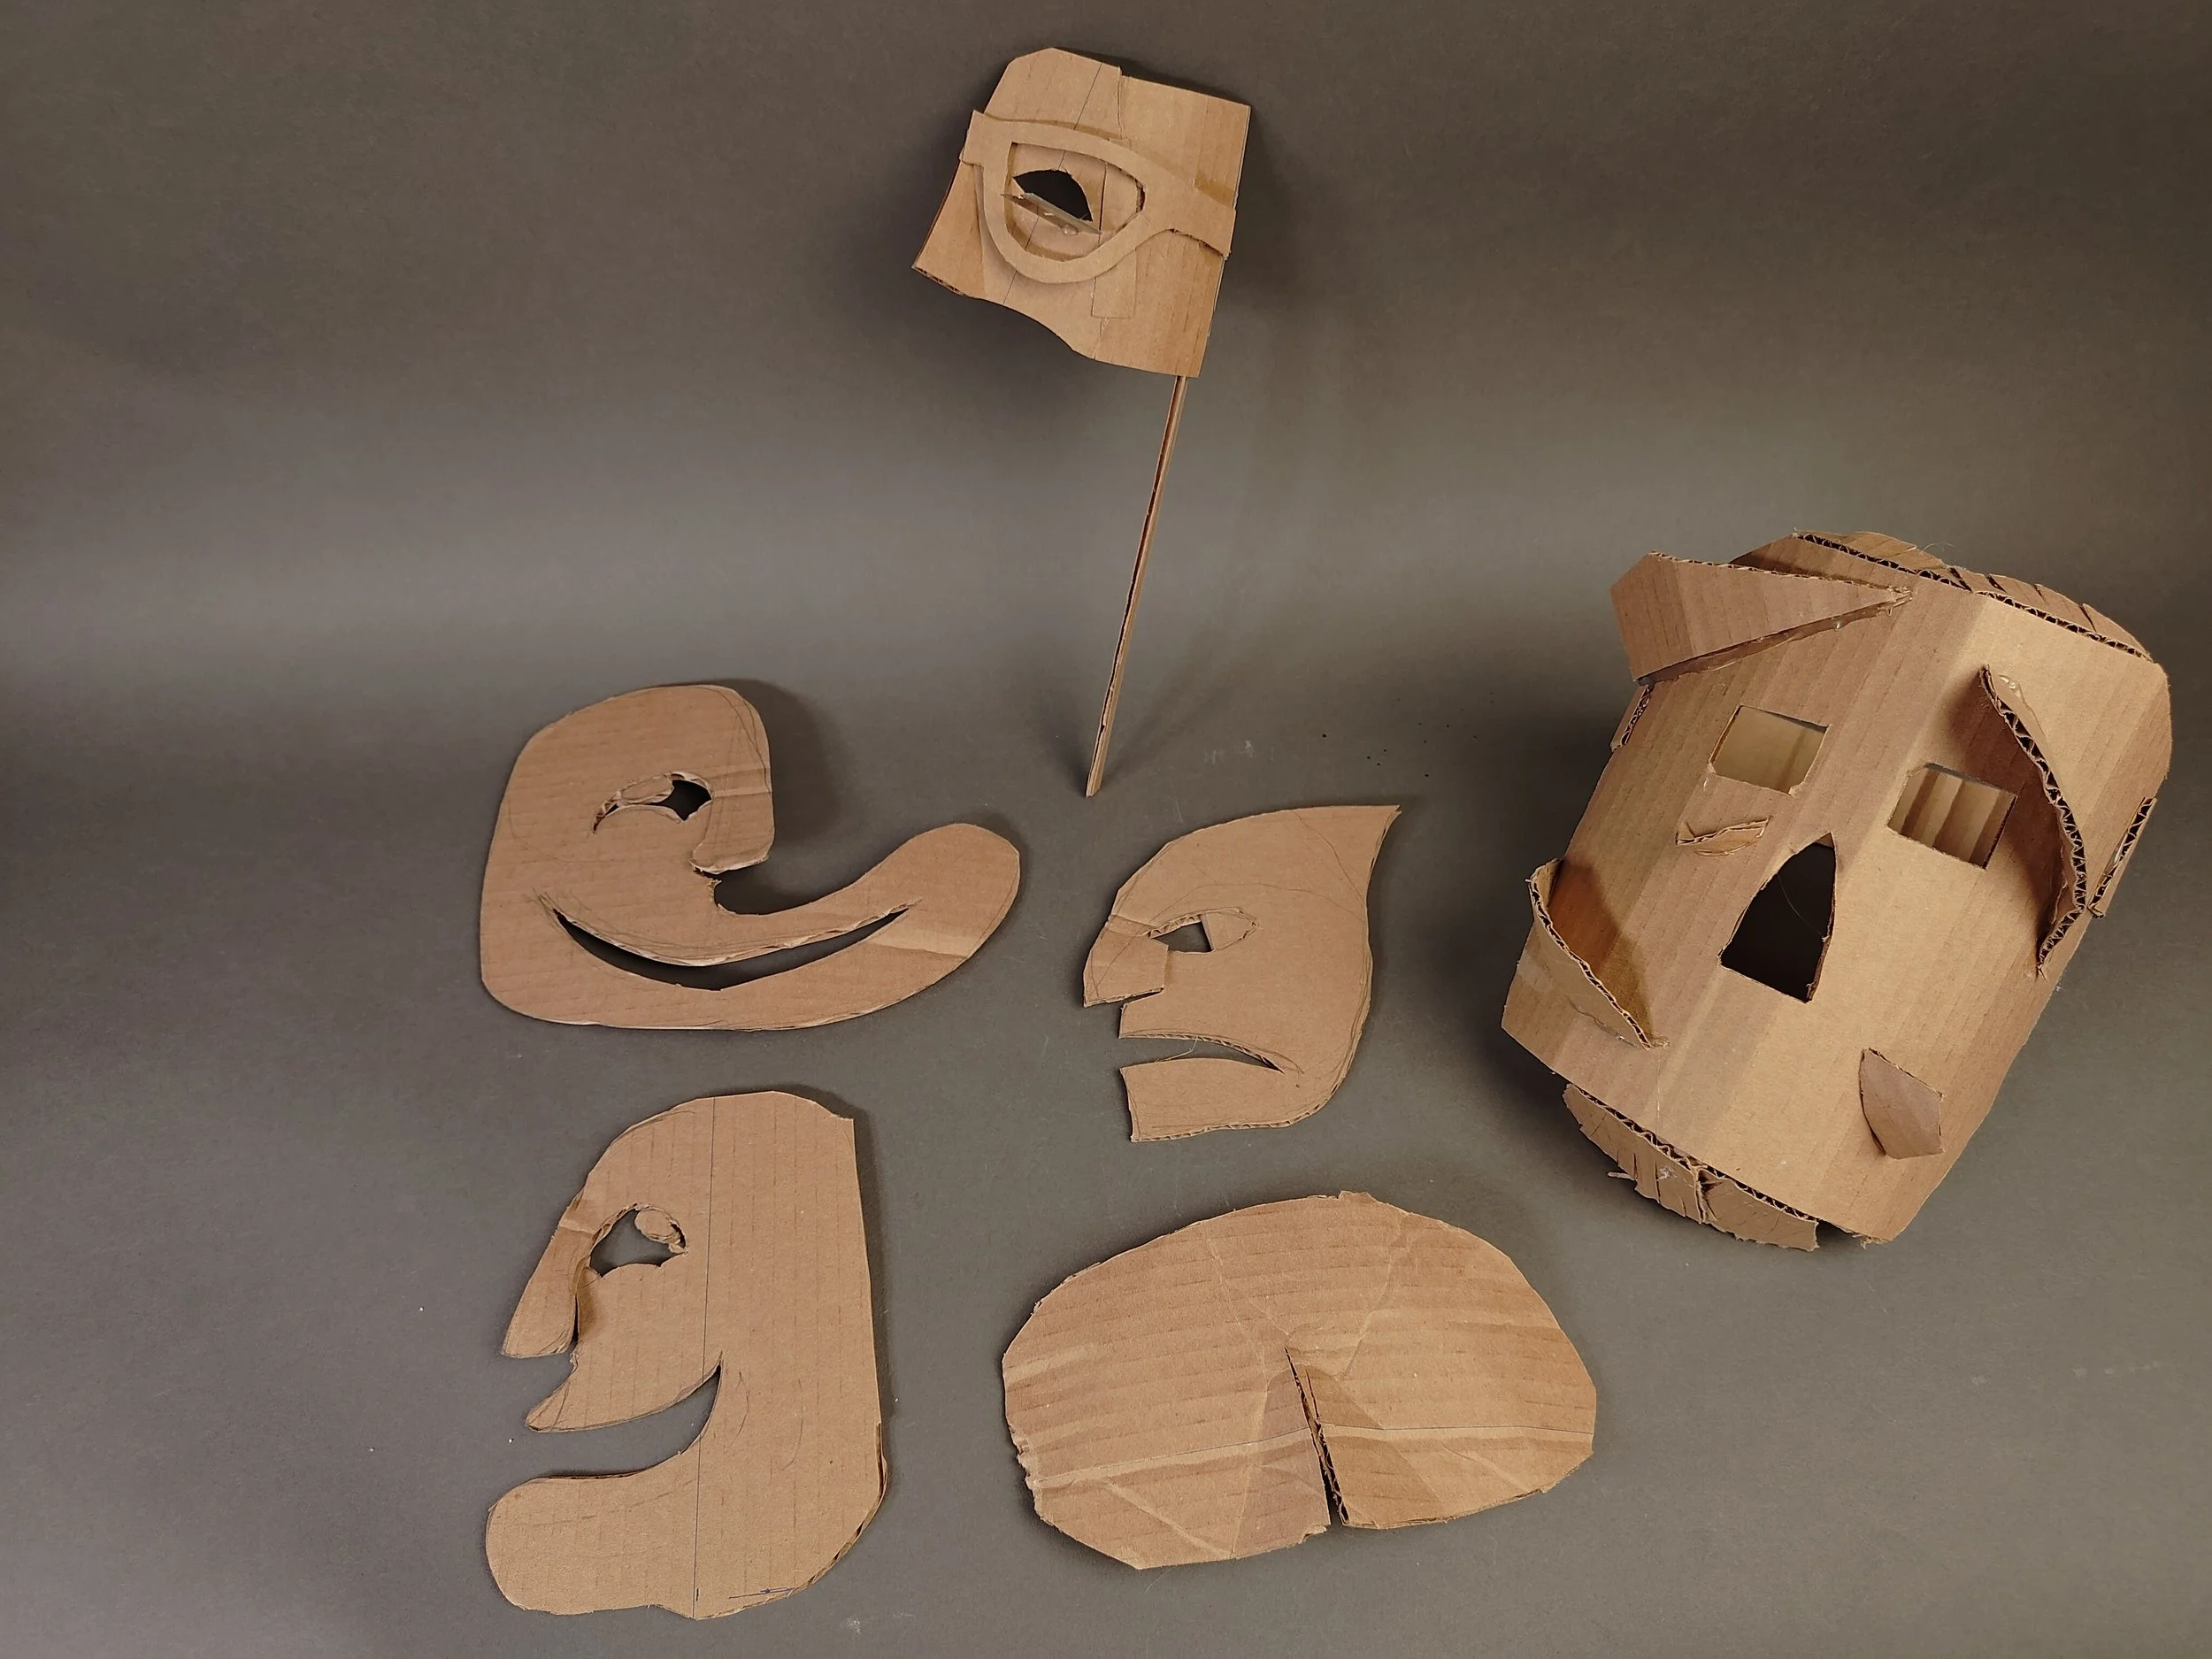
Prototyping
Low-fidelity cardboard prototypes were used to determine face coverage and sizing.
They also allowed us to better visualize the designs and make quick and easy changes
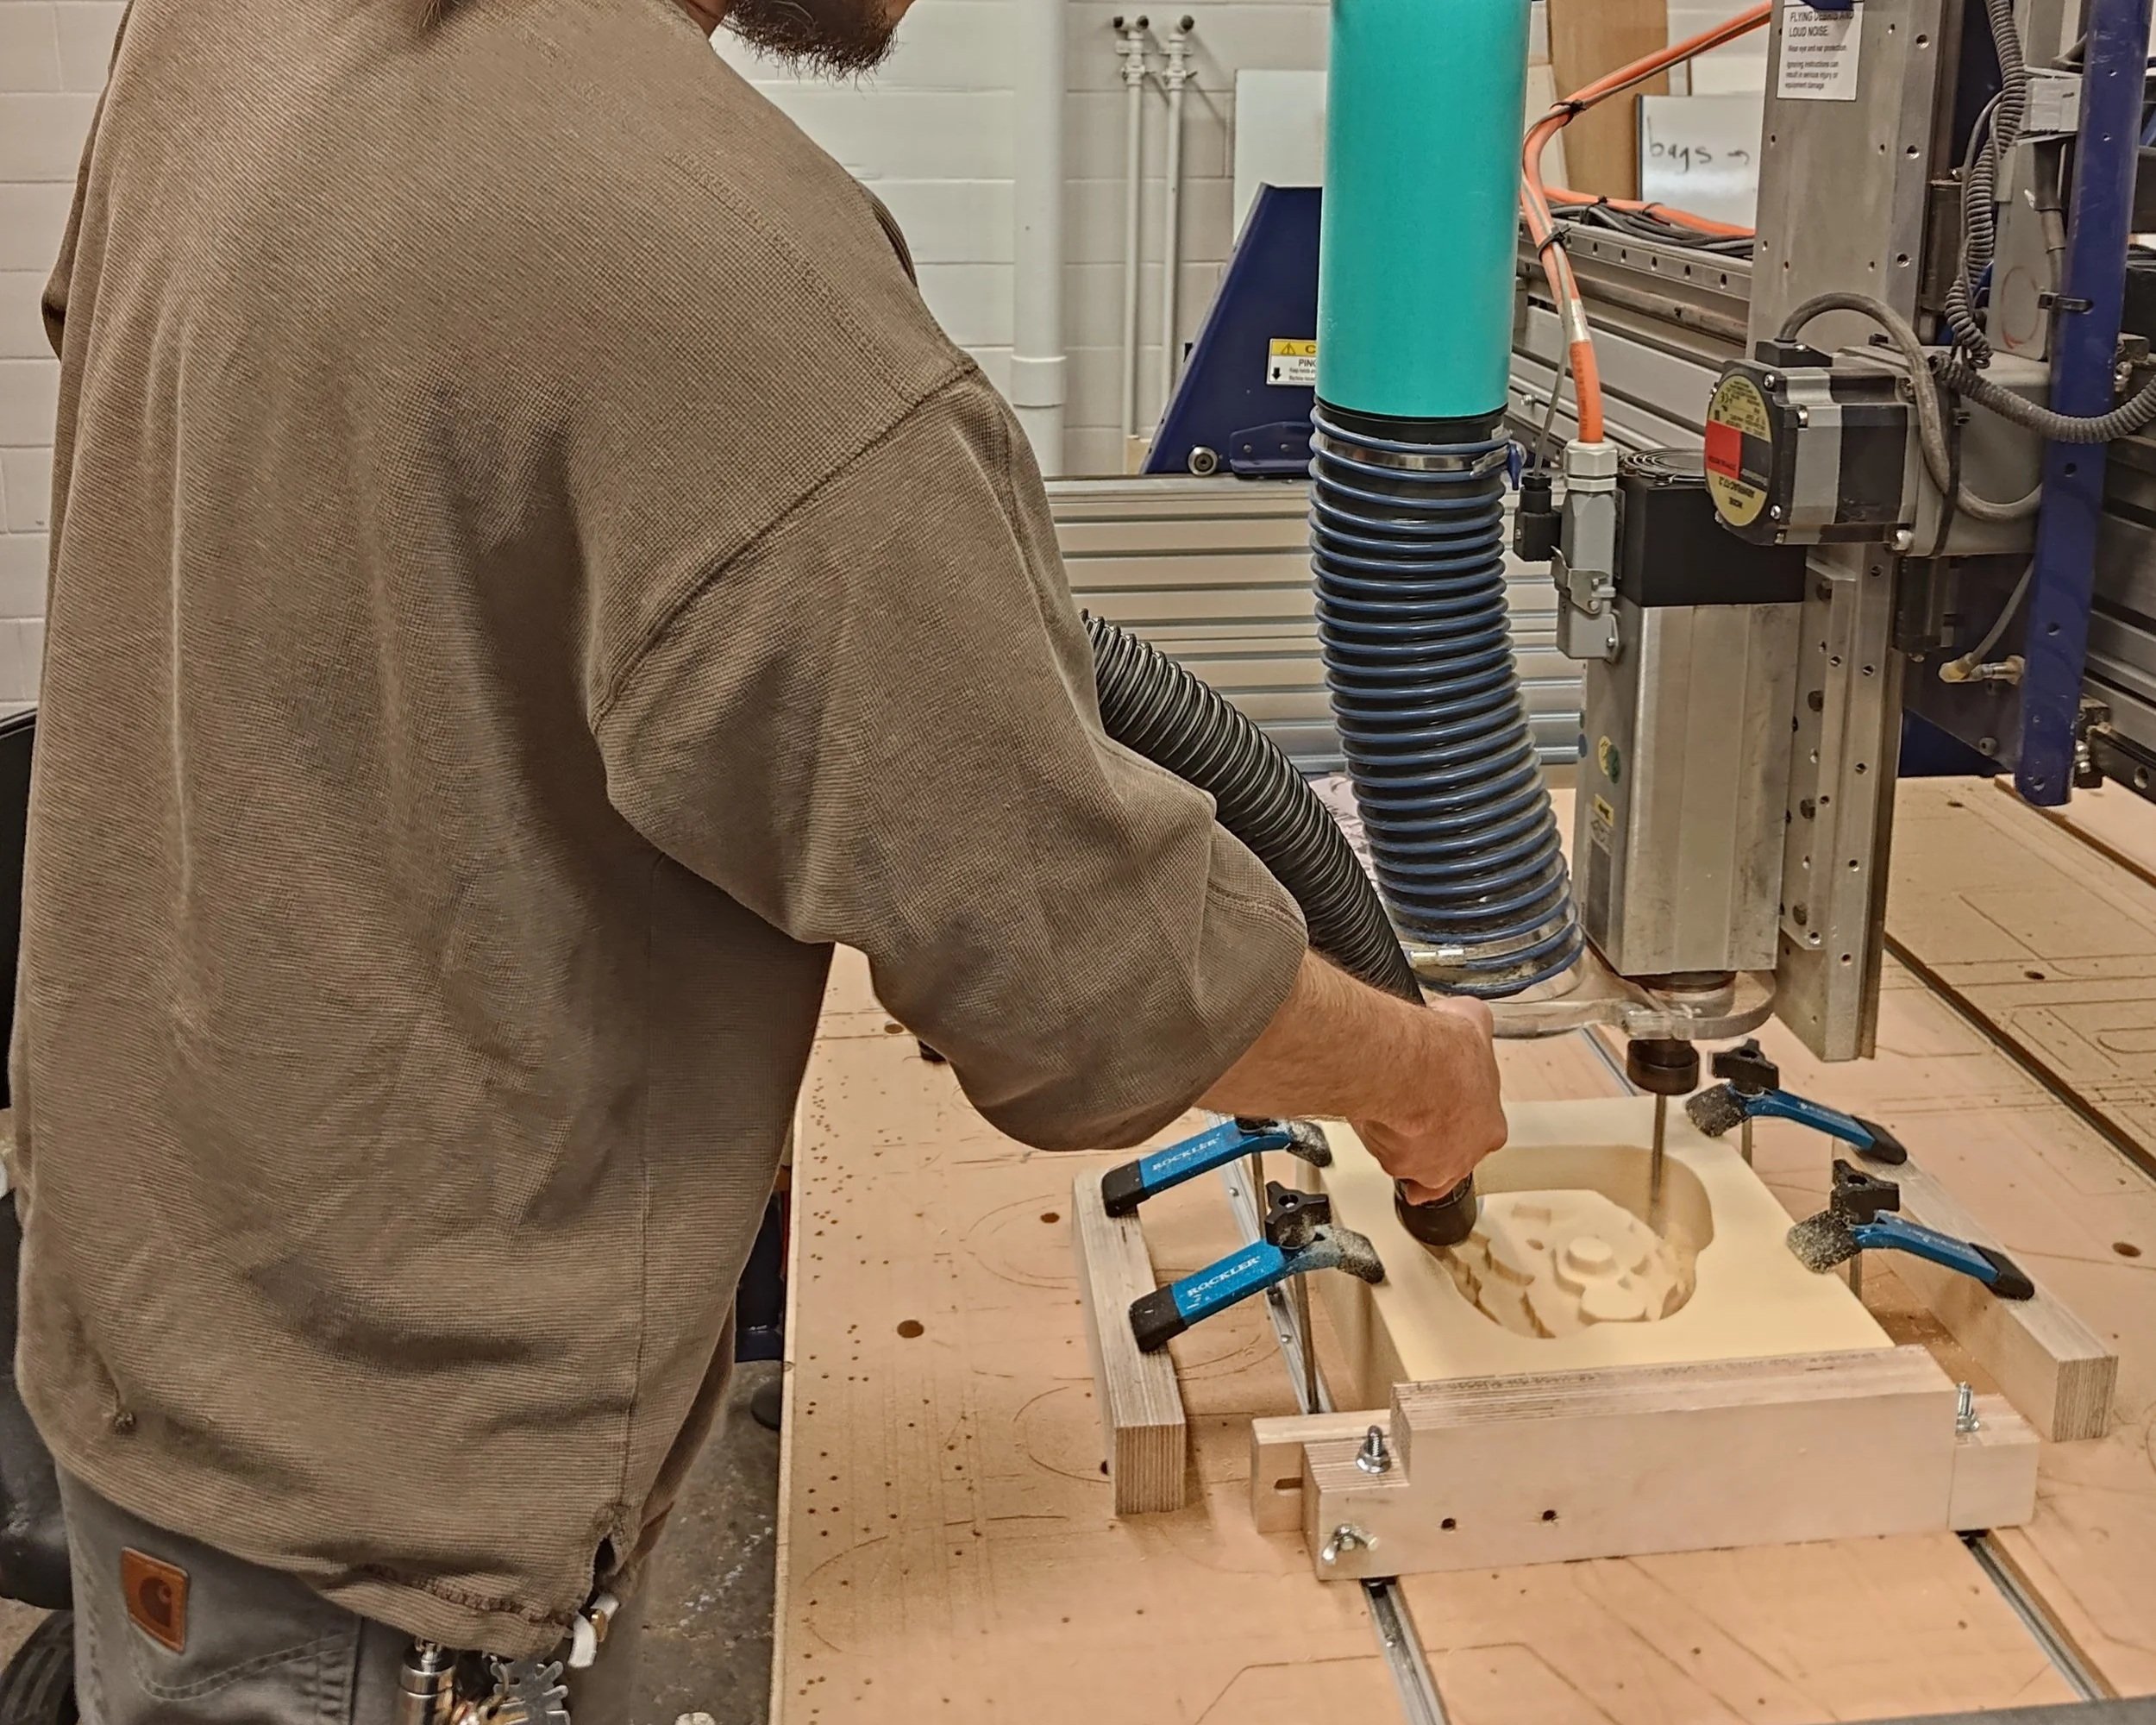
CNC Machining
The mask’s master model was made out of HDPE foam. A material that is easy to machine and shape, as well as having high enough heat resistance to withstand the vacuum forming process.
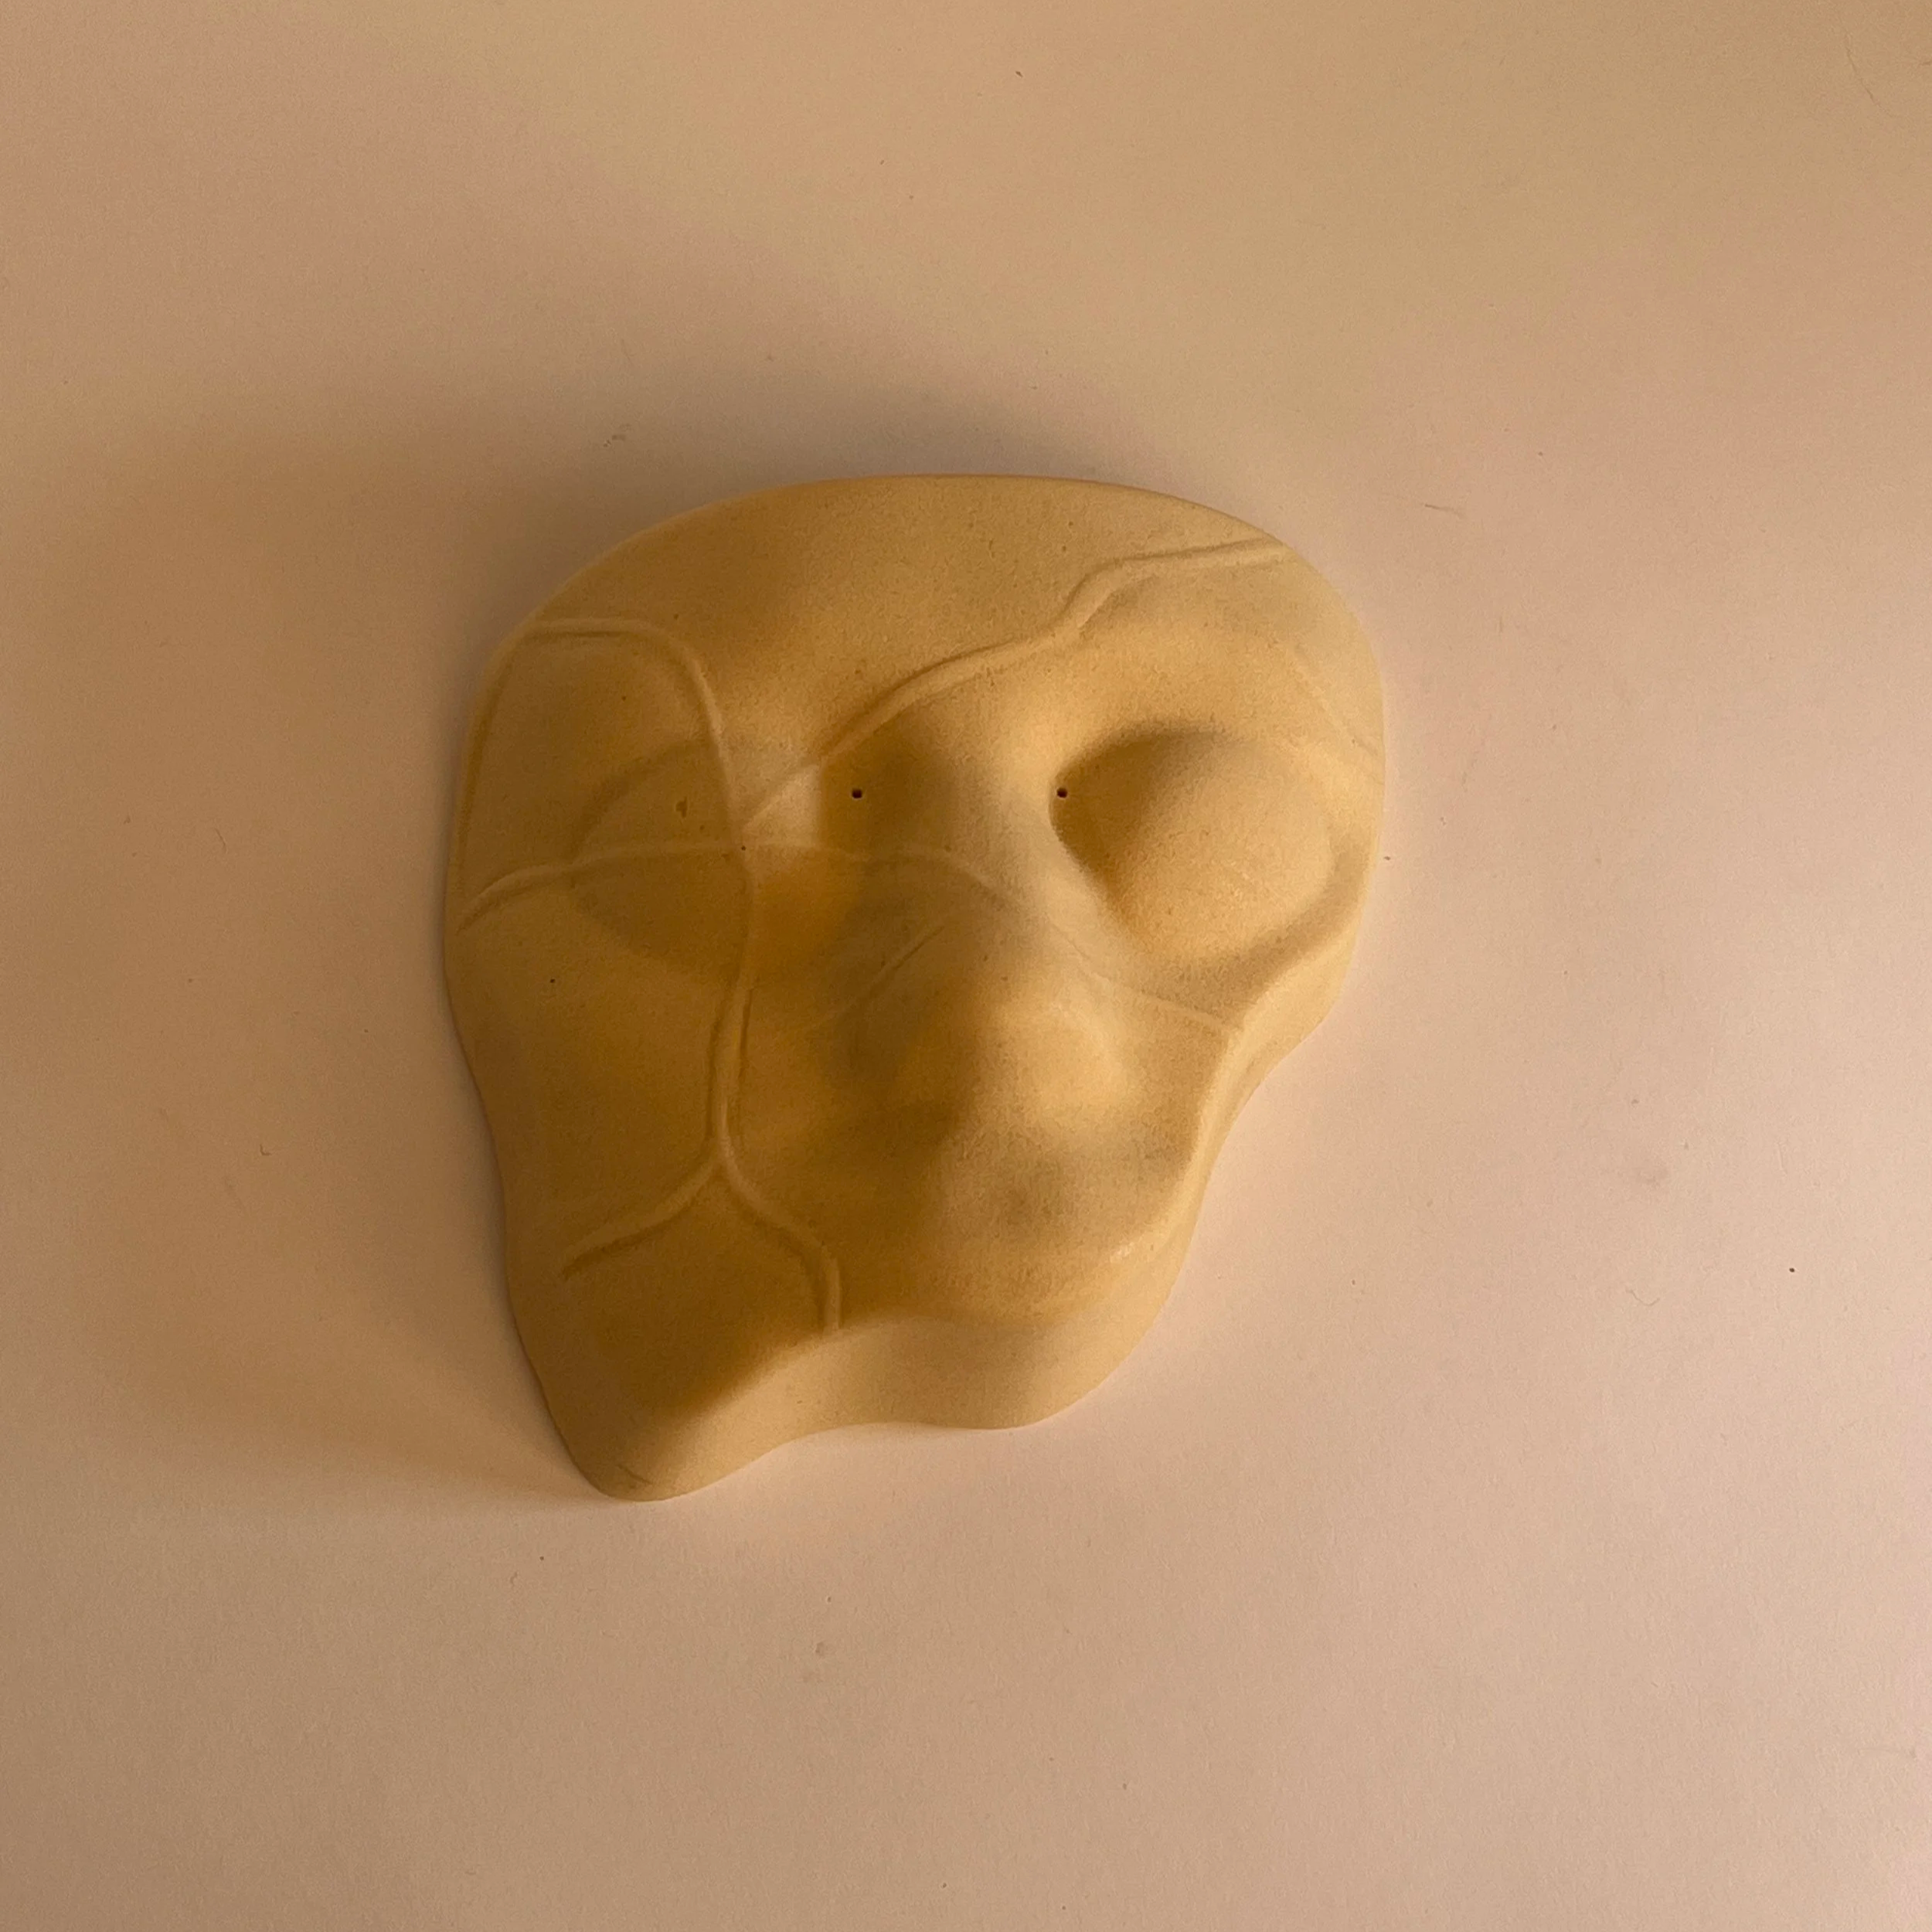
Finished model
Once machined, the model was then sanded down to better highlight the smaller details. Also ensuring that the vacuum formed plastic could be easily removed.
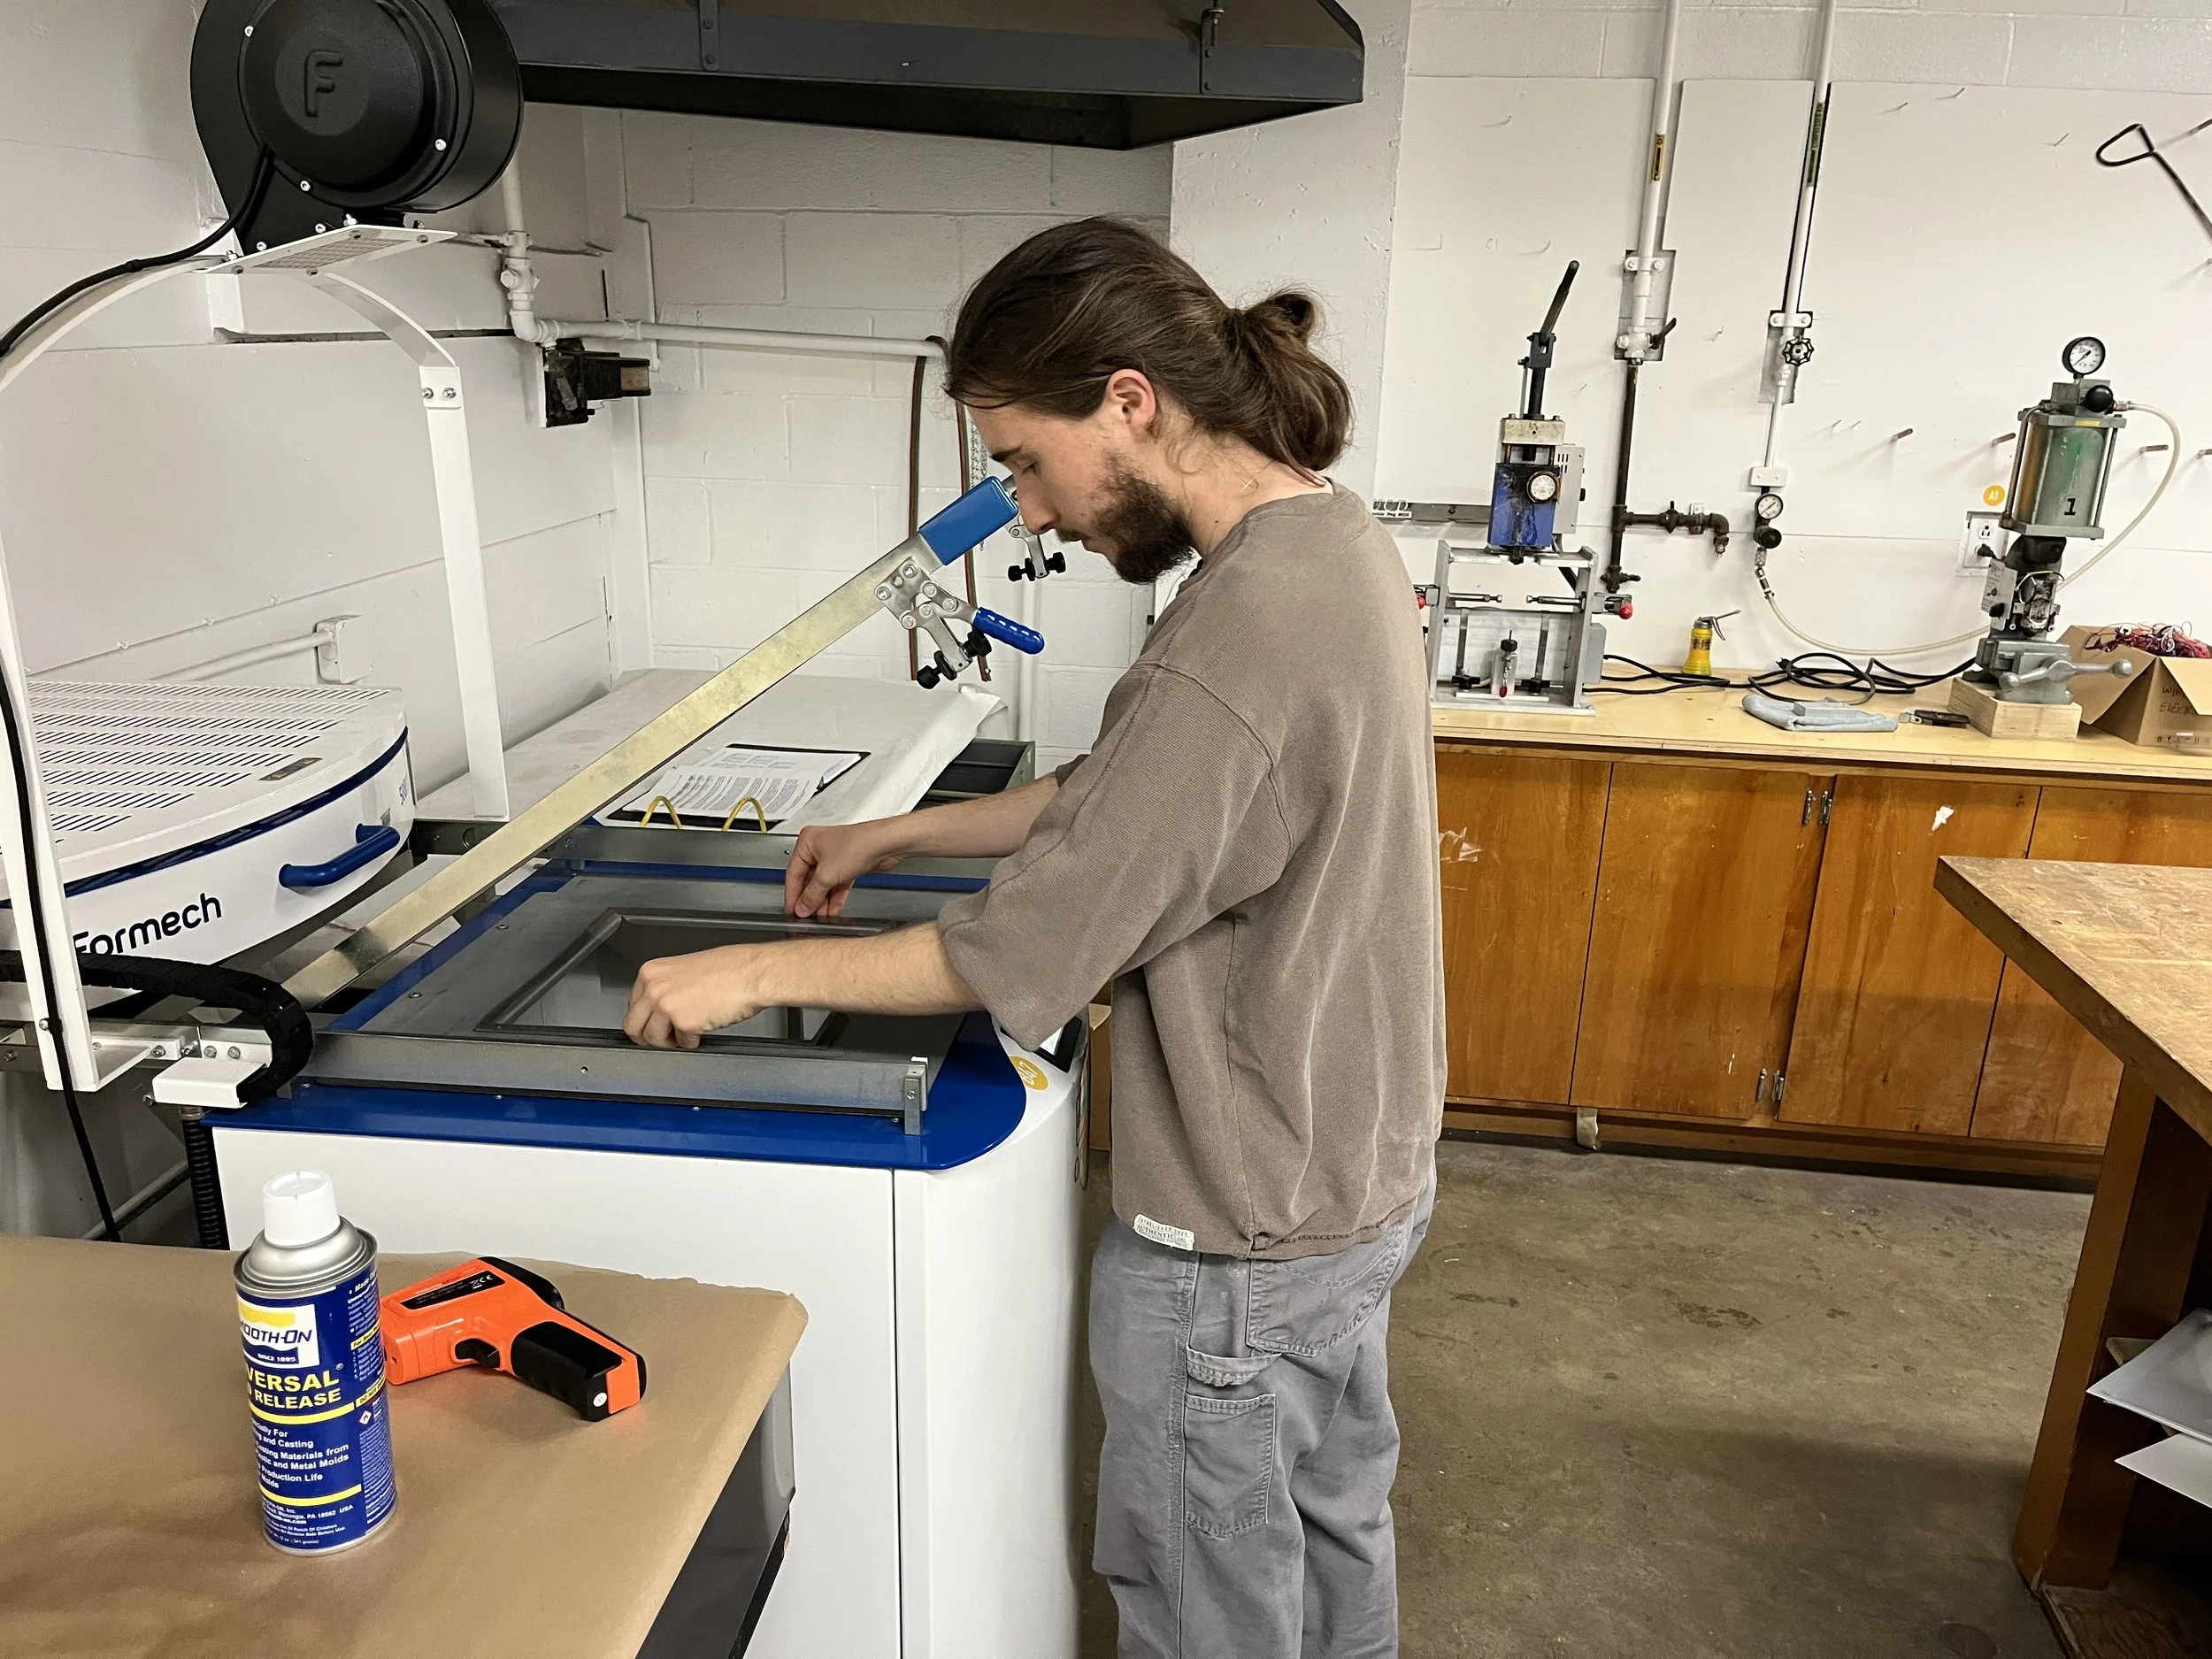
Vacuum Forming
Polycarbonate sheets were used to create the masks as they are able to be optically clear, which was important to the design of the eye hole.
It also plays into the irony of the shop safety mask as polycarbonate is also what is used for safety glasses.

Postprocessing
A Dremel was used to trim off the flashing from the vacuum formed polycarbonate, bringing it to its final shape.
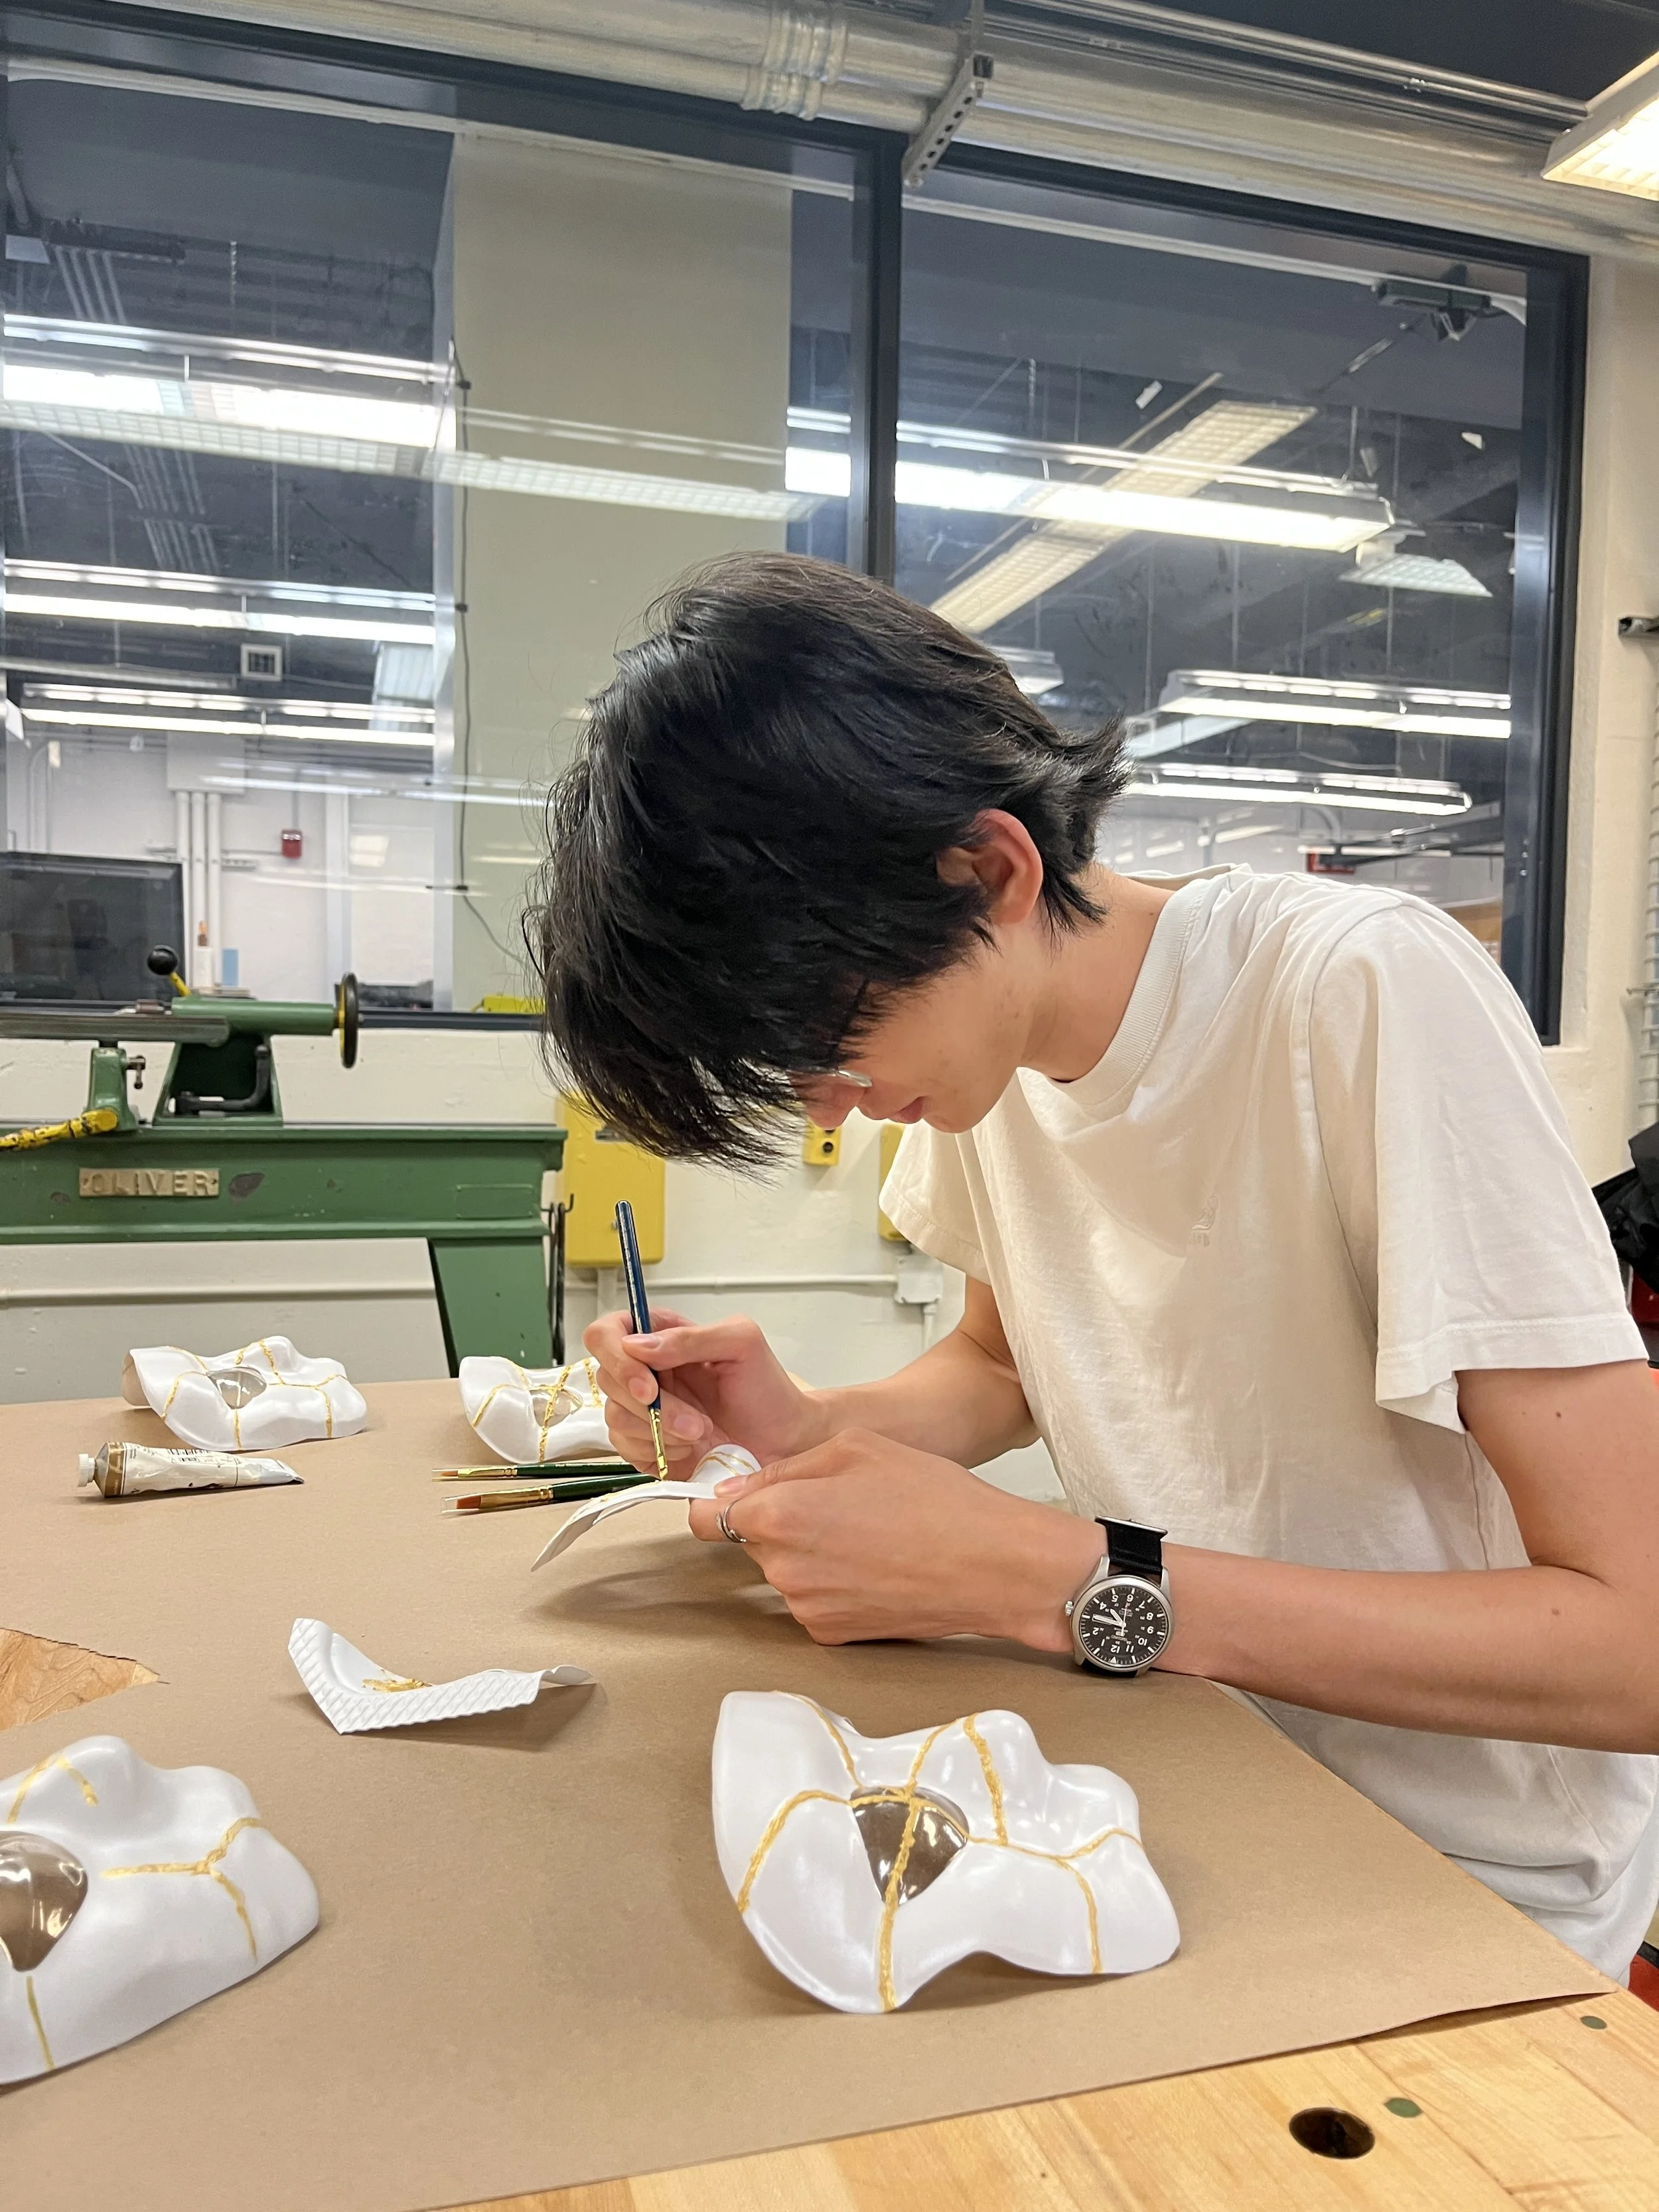
Painting
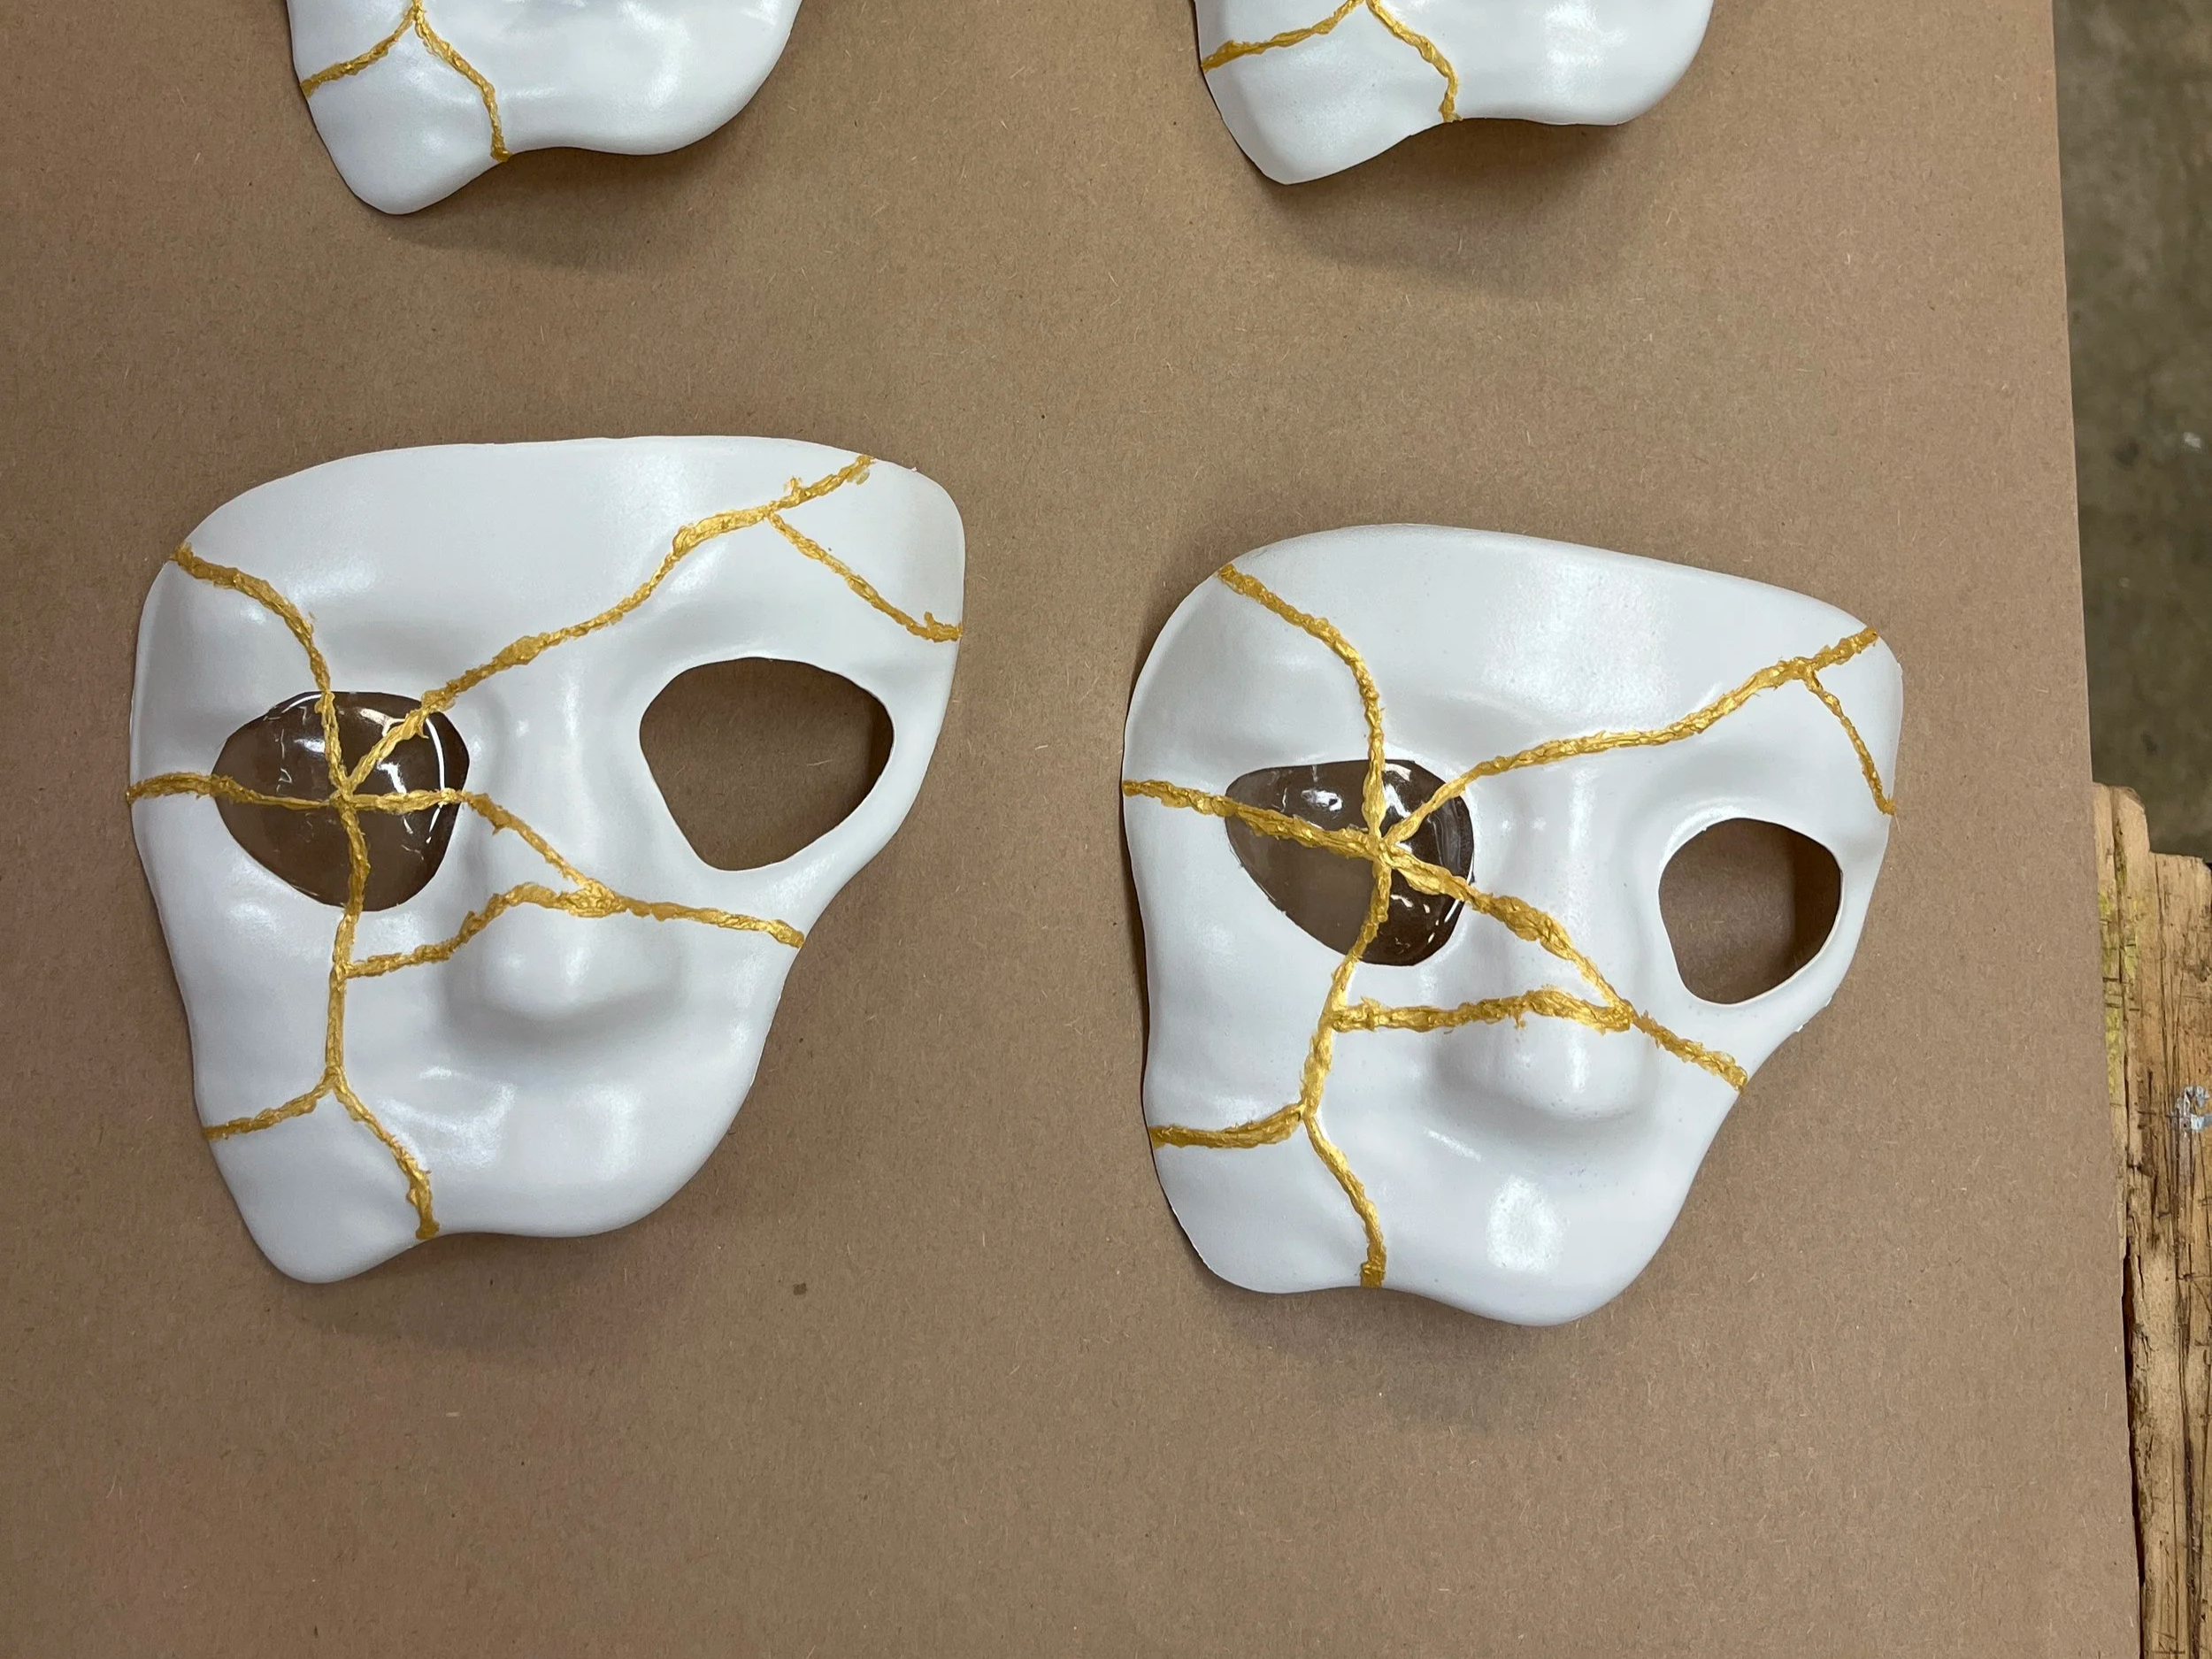
The mask was spray painted white with the eye was masked off to preserve the polycarbonate's clarity. The crack details were then hand painted using a thick acrylic gold, building up a chunky, glossy texture that catches the light along the cracks.
Waiting
While the Paint was drying, we began to prepare for the next steps, including finding razer blades and elastic.
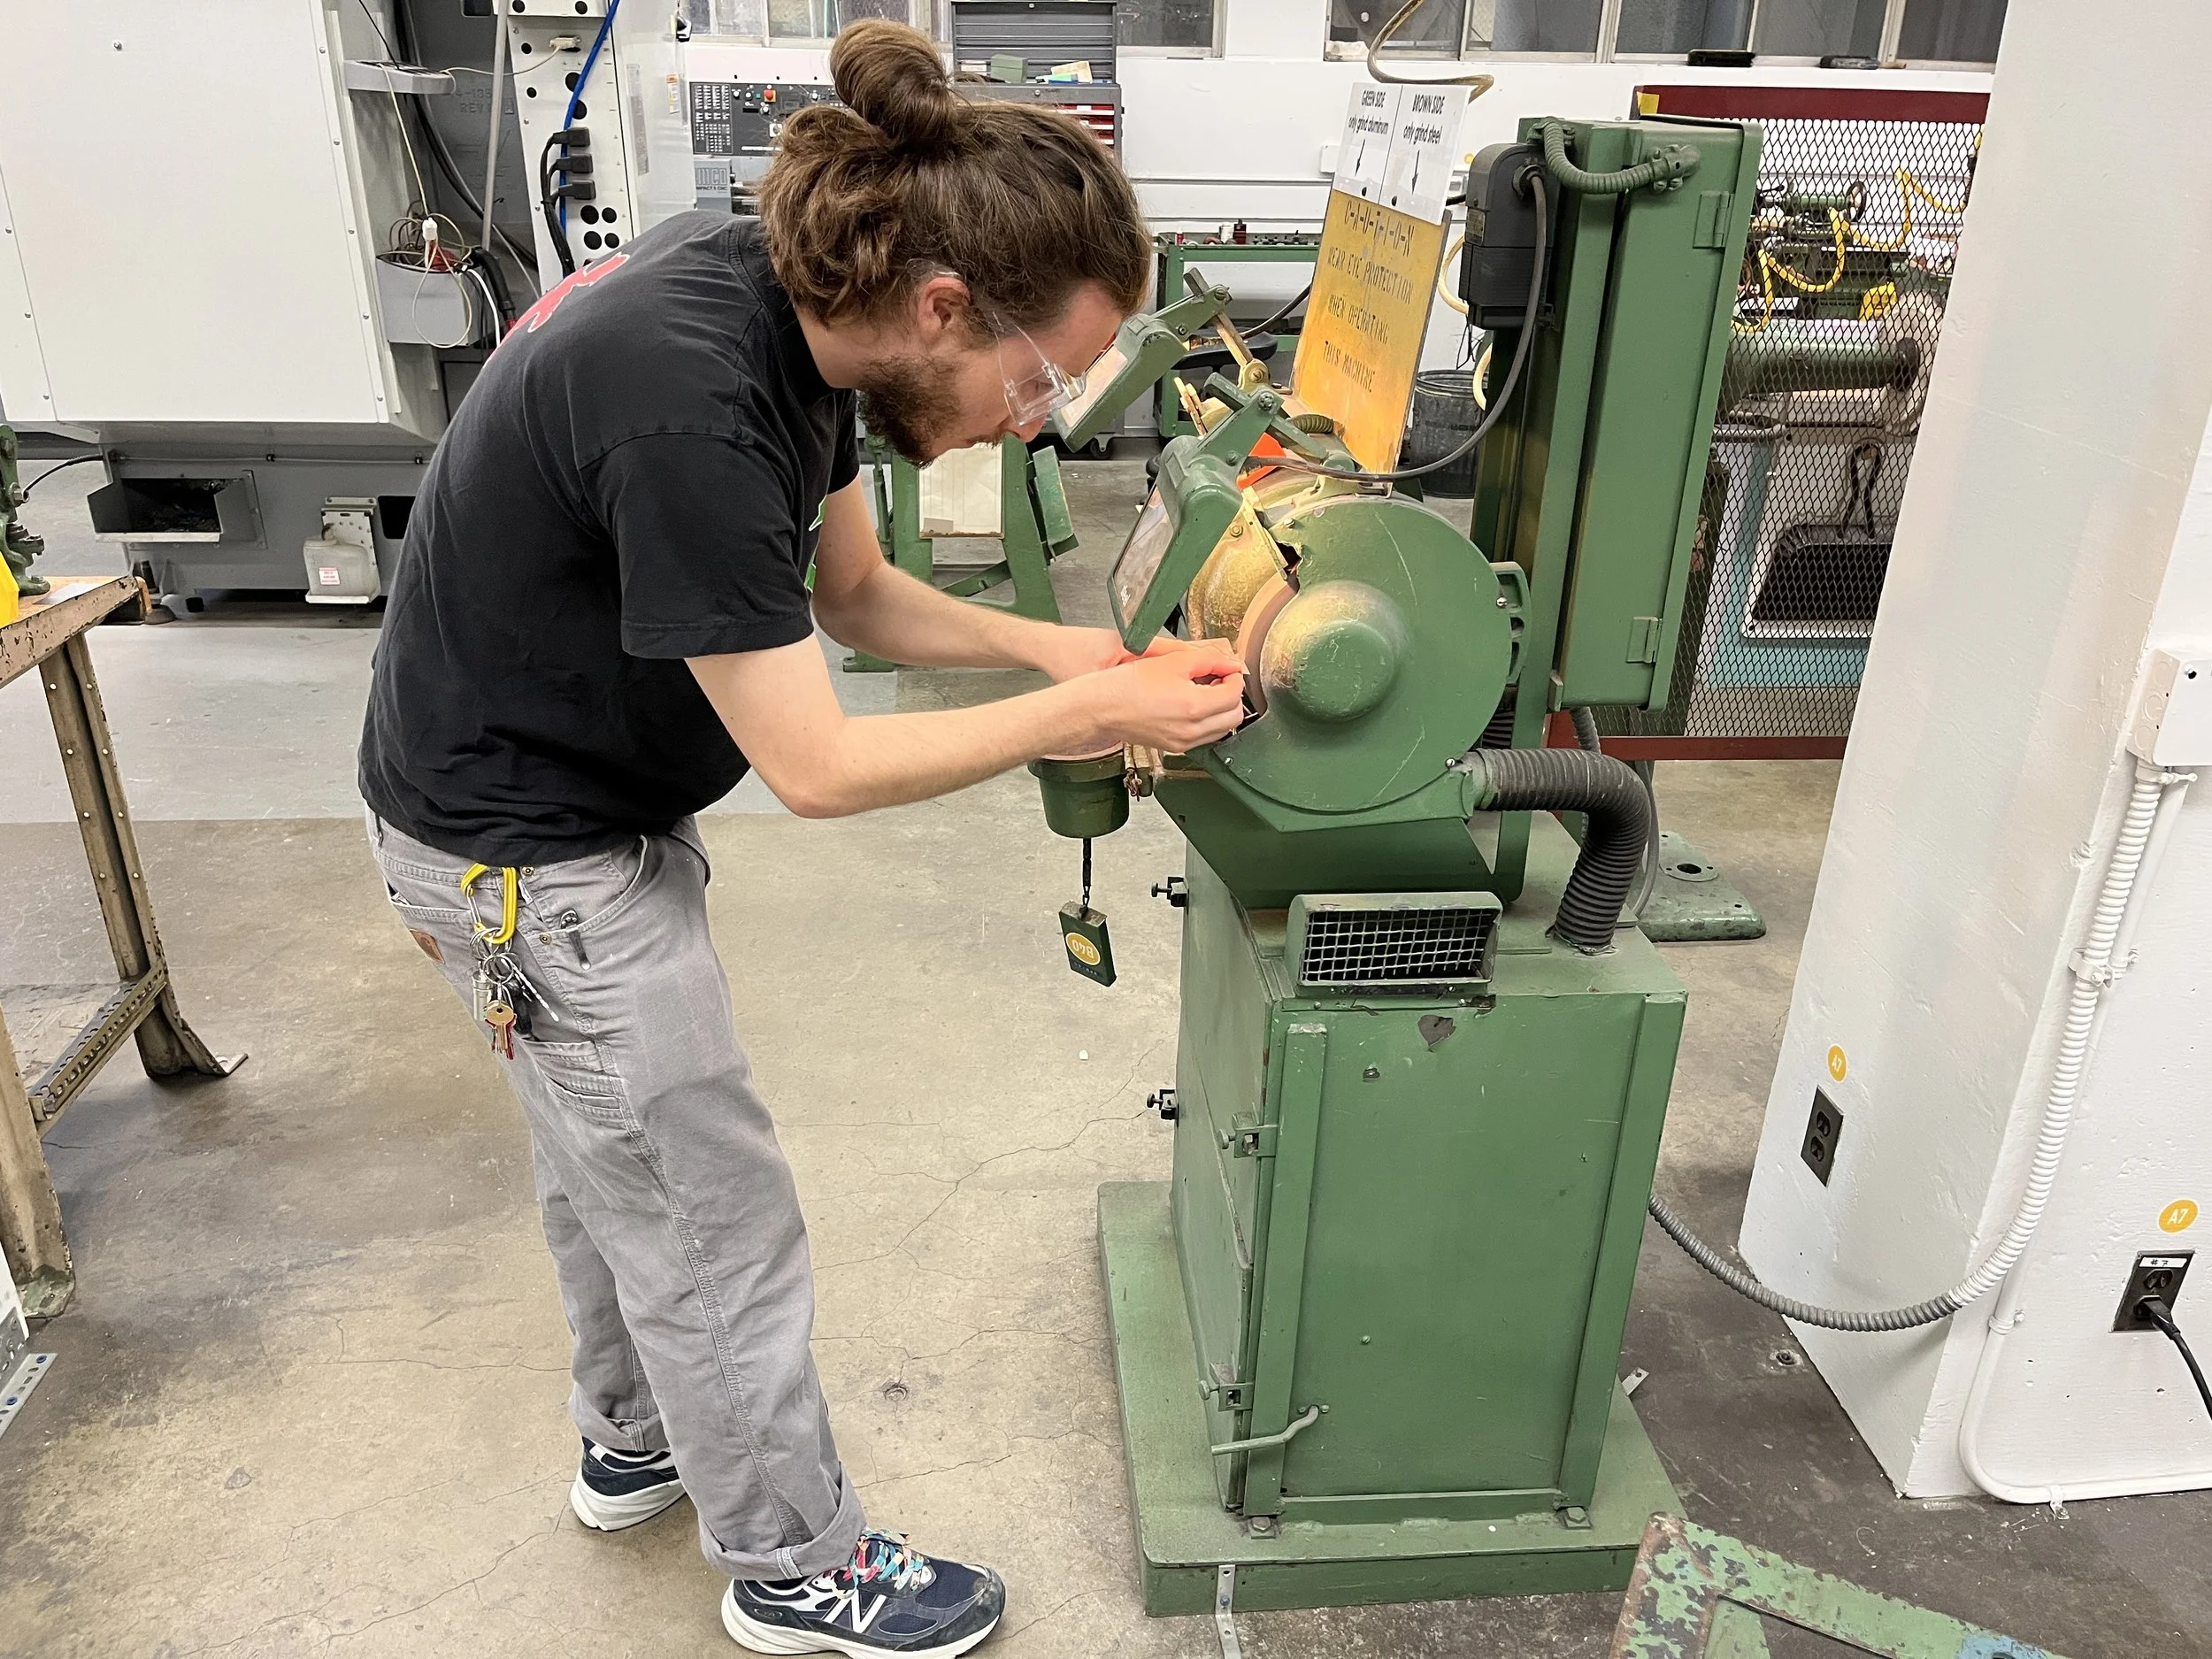
Hardware Prep
All of the razer blades, nails, and metal scrap was dulled using the bench grinder to ensure the wearers safety. We made sure to keep the secondary bevel to preserve the visual impact of such objects imbedded into a human face.
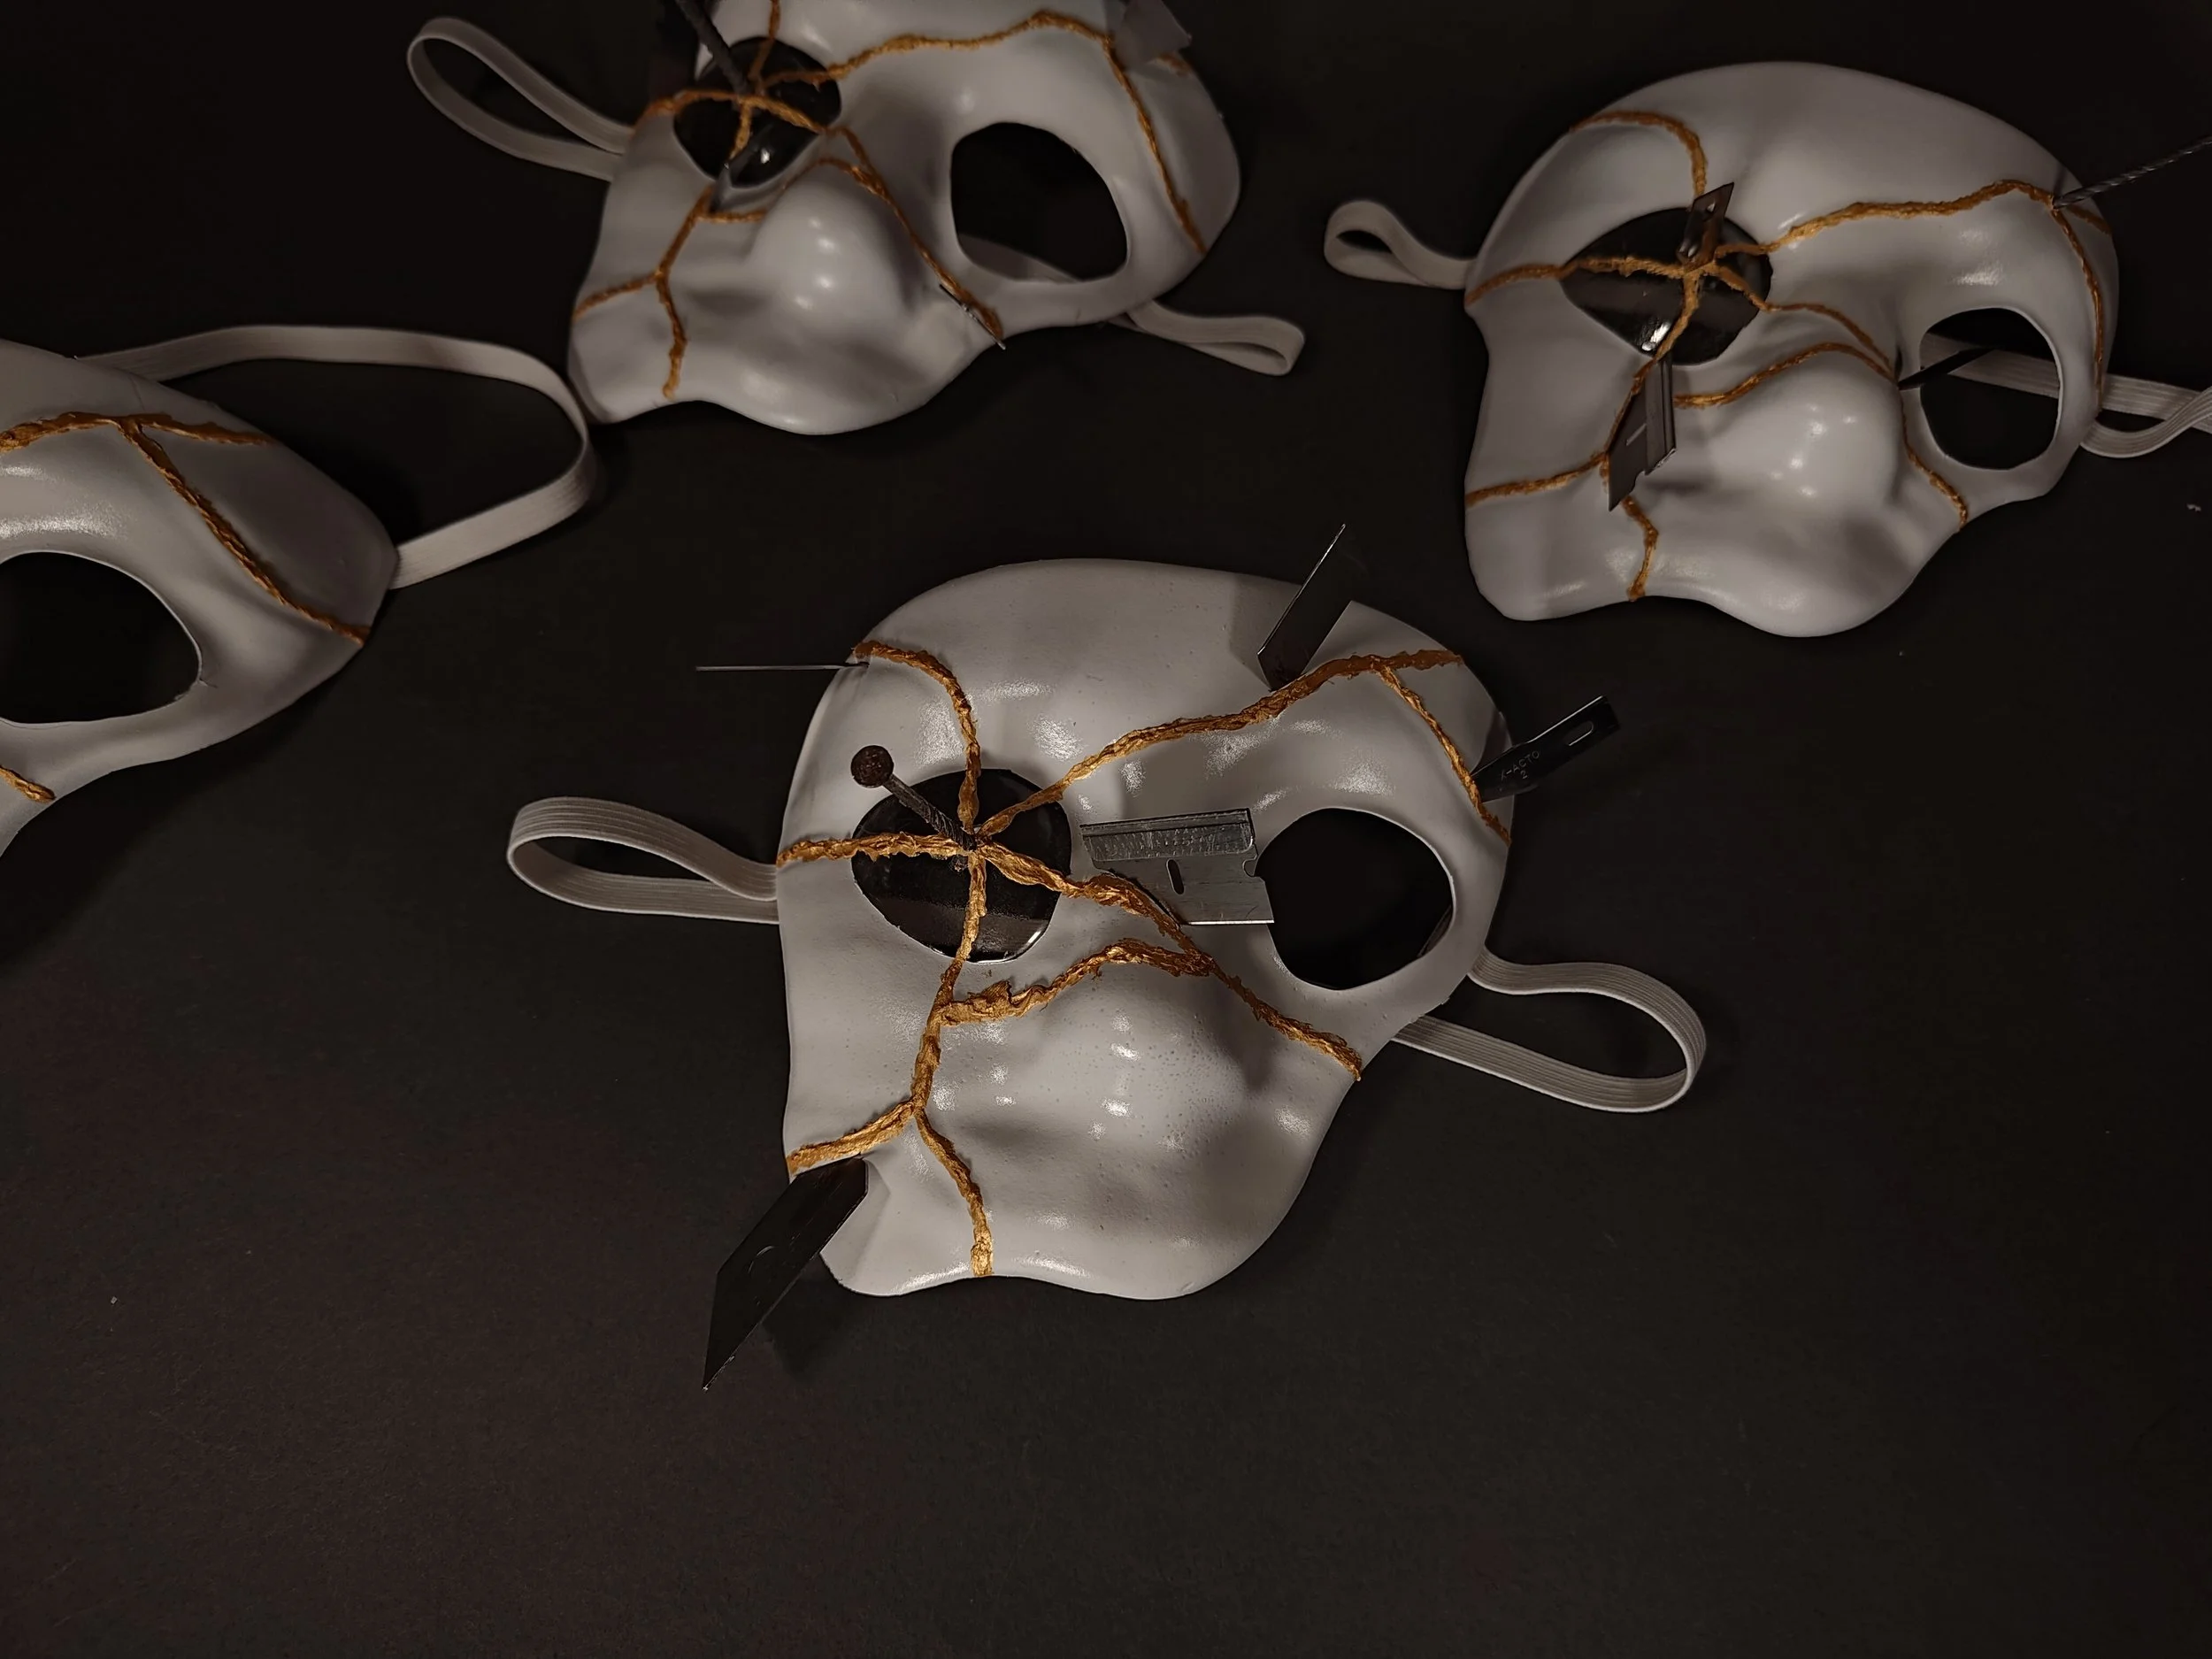
Final Product
The finished masks are embedded with the razorblades and metal hardware, all following the gold cracks, focusing in on the lens in front of the eye.